Showing posts with label Christmas. Show all posts

Friday, December 30, 2011

Advent Calendar Wreath

I got a new Accucut die called Box-Bon Bon. Shortly after it arrived Accucut posted a contest and Amanda suggested i use it to make something for the contest. It is a pinnovation die and there aren't many videos in that section yet. But I never used it that way. I created 25 boxes and turned them into a wreath that is used as an advent calendar. I used Graphics 45 Christmas paper and feel it turned out awesome!
Graphics 45 thought so too and it won a Randon Crafts of Christmas prize from them. I haven't received the prize yet but will let you kow what it was when it arrives....thank you Graphics 45, I love your products.
I won't know if it has won the Accucut contest until the New Year but I will let you know if it does.
You can view the video below.


Thanks,


Wednesday, December 28, 2011

December Daily


I decided to make this album to record our Christmas this year. I have wnated to make a December Daily for a couple of years now but just never took the time. I hope you enjoy it. I have since added my photos and journalling and will try to get a video of the finished album up as well.

Thanks,


Sunday, December 11, 2011

Gift Card Holder Tutorial

This tutorial is image overload...lol. This is an Accucut die I have that makes a gift card holder the size of 4 1/4" x 5 1/2".


First I die cut the base out of Early Expresso cardstock. The fold on the score lines.


Then I cut a matt for the outside out of Designer Paper. I used retired paper, but any paper will work. It is cut to 4" x 5 1/4". Then I rounded the corners and sponged the edges. You could also use an embossing folder to emboss your paper. I think I used Snow Burst by Stampin Up, available in the current mini.


Apply adhesive to the back. Be careful to apply only to outside edges or you will interfere with the part that actually holds the cift card.


Attach to the outside of the part that will hold the card.


Cut a strip of cardstock 1" x 12". Gently wrap around you base as shown creasing at the folds. This works better if it is not too snug, so don't pull it too tight or belly band will be difficult to remove and even more difficult to put back on.


Apply adhesive to the overlap and adhere.


To embellish my belly band I die cut a mini baroque shape from cardstock.


I like to add dimension, so I add dimensional tape on top of the belly band. You can add to the back of the die cut but if it gets on the base the belly band might not be able to be removed without destroying your holder.


Attach the die cut to the foam tape.


Die cut another shape from very vanilla cardstock, to hold your sentiment on top of the previous die cut. I am using a Nestie. The largest oval from Classic Oval small set.


Without removing my cardstock, I sponge around the edges.


Then after stamping off the image once on scratch paper I then stamp the second time onto the oval in the center.I beleive the skaters are from Winter Post by Stampin Up.


Then using Cherry Cobler ink, a nice deep red, I stamped my sentiment on top of the previous image.


Add dimensionals to the back of the die cut oval and adhere to the center of the baroque die cut.


I then used something I haven't used for a very long time, Dew Drops. I attached one to either side using glue dots.


The gift card die comes with a matt piece. I die cut it using very vanilla cardstock to make my sentiment piece for the inside of the holder.


I sponged the edges.


Then stamped an image and my sentiment. I stamped the image off once on scratch paper first.


Then adhere to the inside of the holder. To the part that is not where the gift card goes.


I die cut two tiny tabs.


sponged the edges.


Using a small To, From stamp I used a marker to ink each work and stamped one on each of my two tags.


Using a small hole punch, I put a hole in the edge of the baroque die cut.


I then cut about 8" of bakers twine to attach the tags.


Thread the twine through the hole and the tags to attach to the holder.


I then tied a bow.


The finished holder!


I hope you enjoyed this tutorial. This is a really nice way to dress up your gift cards.


Thanks,


Tuesday, November 22, 2011

Club Projects

Here are the three adorable tags we made in club this month.


The first is a stocking tag. I have to admit during the making of this I had a two year old moment. Half the class had these beautiful Glimmer paper snowflakes to decorate their stocking with and the rest of us had the holly leaves. Well, when I found out I didn't have a beautiful, sparkly snowflake I blurted out " well, that's not fair" it was too late it was out of my mouth and the whole class heard. I felt so silly but I really did want a sparkly snowflake and not holly leaves. It is an adorable tag though.


So this is the next tag, a sweet little angel. She is made using an assortment of Stampin Up Punches.


Here is the last tag. This tag everyone got to use some glimmer paper. See how pretty it is. We tore just a small piece and some white paper and made the hills, added some punched trees and voila another fun tag.

I always enjoy club. Thanks Irene for the great projects and sorry for being such a two year old. (but the glimmer paper snowflake was really pretty)

Thanks for stopping by,


Saturday, November 19, 2011

Christmas Planner - Different Version

I created a slightly different version of the Christmas Planner. You can view the video below.


Thanks,

Tuesday, November 15, 2011

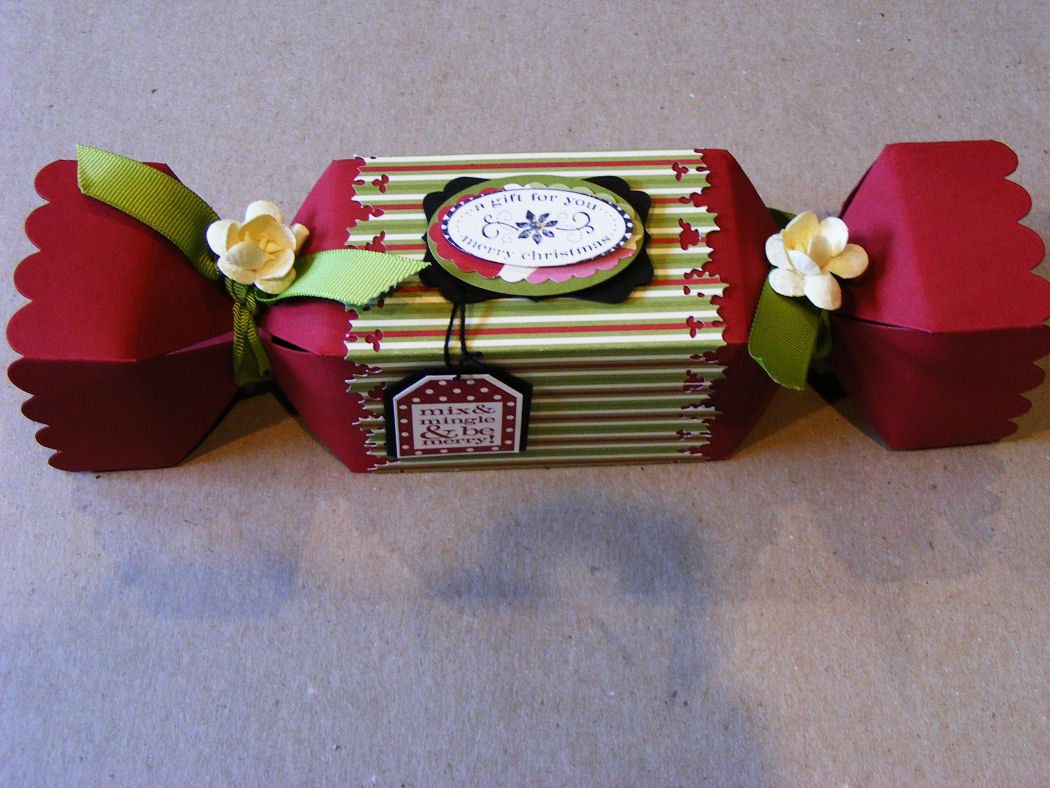
Love My Cracker Box Die

I am loving all the cute boxes I can make using this one die. It is a good size and is so versatile. Here is a Christmas Box version. They are easy to assemble and fun to embellish. The possibilities for this die are endless.

You can get these die cuts from me by going to my store at

http://dcands.ca

LoveIt! and it has been quite popular with my customers.

Thanks,


Thursday, October 27, 2011

Santa'sStocking Mini


Here I have made a mini using Stampin Up's new Holiday Stocking die and new Peekaboo Frames die. I used Letters to Santa designer paper also from Stampin Up.


I used the peekaboo frames to create embellishments for the pages and adhered them so that they also act as pockets to be able to tuck photos in behind.


I used flowers fro Prima and I Am Roses to embellish as well. The ribbons are from Stampin Up.

This is my next class. Hope you enjoyed seeing the peek at this project.


thanks,


Friday, December 24, 2010

A Merry Christmas to You All!

It has been a great year in 2010. Many changes have taken place in my life, but they have all worked out for the best.


I wish everyone a Very Merry Christmas and A Happy New Year, may 2011 bring you all closer to your dreams.


Thank you all for your support and encouragement over the past year,


Thursday, December 2, 2010

Planner Video

Below is the video of the planner so you can see better all the little details on this project.


Thanks,


Wednesday, December 1, 2010

PaPer Cubed December Challenge

Here is my submission for Paper Cubed's December challenge. The challenge was to create some type of organizer for the holidays. This is what I came up with. I will post a video of it tomorrow.

Here is the inside. There are tabbed divided sections, and pockets for assorted items. The inside section is removable so when it is used up you can replace it and still use the cover.
I hope you enjoyed this fun planner
Thanks,