Thursday, November 26, 2009

On The 4th Week to Christmas....

Dream, Create and Share taught to me...how to make A Merry Little banner for Christmas!

Can you believe it...four weeks..it is getting so close! Are you ready? I am not. I need to get moving.

How cute is this banner? The letters swing and it is decorated on both sides.

Here is the back


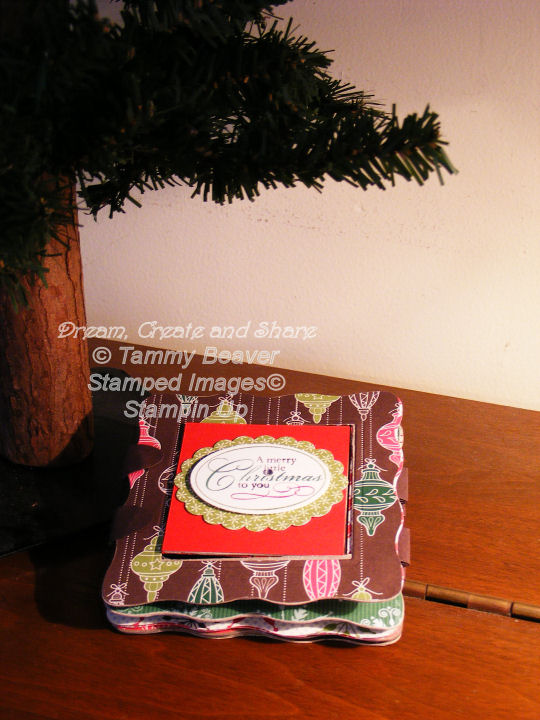
It folds up all nice and compact for storage.

And fits perfectly inside the largest box from last weeks' tutorial. As always, this tutorial is only available until next week's tutorial is posted and is only $2.00. It is in PDF format and will be e-mailed to you within 48 hours, usually less than 24 hours. If you do not receive it in that time, check your junk folder and then contact me and I will resend.
4th week to Christmas tutorial, MERRY banner.

This tutorial is no longer available!
Thanks,


Tuesday, November 24, 2009

I Won!

I was checking my e-mail before bed and got a great one. Apparently I won some fun blog candy.
Twila, over at Stamp A Little Longer, had a jar full of ribbon and asked people to guess how much was in the jar, now mind you it does not look like it but the jar had 120 feet of ribbon in it! You can see the jar here. Does it look like 120 feet to you? Anyway I guessed 76, thinking it was probably more than it looked and it was...even more than I thought. LOL. I checked and I guessed the highest amount so, yay me!
Thank you Twila, I can hardly wait to get it and check out all that fun ribbon.

Thanks,

Thursday, November 19, 2009

On the 5th Week to Christmas

Dream, Create and Share taught to me...how to make some great little nesting boxes. Can you believe it is only 5 more weeks to Christmas? Oh my! Where does the time go? Anyway, these little boxes are perfect for so many things. Alone they fit inside of each other, but separately they each will hold various gifts that may be handmade or store bought, either way the packaging needs to be just right, it helps build the anticipation, and who doesn't want their recipient to be excited about a gift you chose especially for them?

Each box is trimmed slightly different than the others, but they coordinate. Two have windows on the top.

Have you ever wrapped a gift inside a gift? That is always fun to do, well you can do that with these if you want.

Yup, that is another sneak peek at an upcoming tutorial. Next weeks actually. See how perfectly it fits into the largest of the three boxes, that is because I designed the box so that it would fit into the box. The other boxes were simply adjusted down from there.


So if you are looking for some fun packaging ideas, this tutorial may be just what you need and it is only $2.00 and ONLY available until next week's tutorial posting. I hope you are enjoying my tutorials.


This tutorial is no longer available!

Thanks,


Wednesday, November 18, 2009

January Class Preview

Hi Paper Crafters,
I am not feeling the best, not sure if I got the flu thing or not...but I feel awful today. Anyway, I made a video of a mini I made for my first class in the new year. This will not be available as a tutorial, only an in person class. The video was made several days ago, but I am posting it today as I am not up to doing much else.
I may post some pictures at a later date.

Thanks,

Monday, November 16, 2009

Wow!

I logged in today and to my surprise, I was over 100,000 hits. I knew I was getting close but I thought it would not be until December.

Thank you so much for all of you who visit this blog, follow this blog, take my classes and especially to those who take the time to leave kind words.

I will be offering some blog candy to celebrate, I also noticed I almost have 100 followers. Hmmm should I wait for the one more so it can be a double celebration? Come on ... One more person sign up as a follower...please! LOL

I know one thing I will be giving away, it will be the Level 2 Hostess set from Stampin Up..."Christmas Punch" this is a very fun and versatile set. I love mine. The one for the blog candy is on it's way but not here yet. Within a week, I think.
I think I will also create a mini for the winner. I may edit this to add some more fun things.

Sound like fun? then leave some love...just post a comment below and the day my stamp set arrives, I will hopefully have the mini done my then and can post a picture. The end of that day will end the running for the blog candy.

I am thankful to you all.

This candy is now closed. The winner will be posted shortly.

Thanks,

Thursday, November 12, 2009

On the 6th Week to Christmas

Dream Create and Share taught to me...how to make this Dazzling Snowflake ornament.
How cute is this ornament? It is an actual snowglobe, you can shake it up and see it snow inside the plastic cup.


Can you see Mr. Snowman? and the trees? Want to know how this is made, then see below.

You can make it single or double sided, but the double sided way is more difficult. Remember, this tutorial is only availbale for one week, and is only $2.00.

This tutorial is no longer available!

Thanks,


Tuesday, November 10, 2009

Birthday Surprise!

Today is a friend of mine's birthday. She was even coming to my house to day to visit teach me, as part of our church activity, so I was rushing around this morning to get her gift done before she arrived. I knew I wanted to make her a mini album, but was not sure how it would turn out. This is the result. The funny thing was, when she arrived I got a cake. It is her birthday and she brings me a cake, how sweet is that? It is delicious too! I LOVE carrot cake.

Anyway...I know, this was kinda last minute...but that often happens for me.
The cover has Prima flower that I stamped text on and a chipboard flourish with bling accents.


Here is the inside cover and first page, which is a pocket page. The inside of the cover has a place where she can put her name or the date or whatever as a label and perhaps a brief summary of what might be in the mini. I was not quite done when she arrived, but she did not mind me finishing it up while she was there. The pocket page is a simple pocket with a tag insert. There is a space for a photo and journalling.

Here is one side of the tag, the other side is blank. I meant to put the journal stamp on the back, but in my rush, I made a boo boo, but I am sure it is okay. She seemed very pleased with the mini.

The back of the first page simply has a Top Note frame. The next page is acetate, but it is hard to take a good picture of acetate, so not sure you can see it very well. It has a couple of flourishes and a frame stamped on it. There are also three blings on each side, in the same place.

Here is the page lifted up some, but still hard to see well.

The next page has a small pocket with a tag insert, sorry I did not get a picture of the tag.
It has a mini clip holding another tag that was actually made from the negative space from the pocket die.
Here are the last two pages, sorry they are a bit blurry, I was rushing. The one has a simple Top Note shape for a photo matt with a flower embellishment. The last page, the inside of the back cover, has a fold out mini album held shut with a photo turn. I have been wanted to include this technique for some time, on a project and now I finally have.

Here is the mini opened up.

and the other side of the mini.
I am so glad I was able to make this for her, she is such a sweet person. She has a great blog, if you get a chance, stop by and wish her a great birthday, and tell her I sent you!
Thanks,


Thursday, November 5, 2009

On the 7th week to Christmas...

Dream, Create and Share taught to me...how to make these cute little bookmarks for my friends.
This fun, quick to make bookmarn slips over the page, rather than being just a flat bookmark. They stay nicely in place as well. I was so excited when I first got this inspiration to make this project, I thought how cute is that!

Here is how it fits over the page.These are so cute...and really fast to make. You do not have to have a winter theme, any theme would work, as for most projects, they are easy to switch up to another theme.
This tutorial is available for $2.00 and ONLY until next weeks posting. Just click the link to buy this tutorial.


This tutorial is no longer available!
Thanks,


Wednesday, November 4, 2009

My Attempt to be on a Design Team

2 Sketches for you recently had a Design team call. I submitted these cards but was not chosen. Oh well, perhaps another time or another team.

I used UTEE to add a super fun glossy accent to the main focal image. I melted it only part way so there was still some texture instead of completely smooth. I wish I would have colored in the skaters before applying the UTEE but too late now.

I border punched both layers and added dimensionals for lots of depth.


This was my fun card. I wanted to send the message, that I was really hoping to be on the team. It is supposed to be a shooting star and my wish on it is on the tag.


Can you read my message? It says" Wish for me, Wish true, DT Member, 2 Sketches 4 you. The big snowflake was my representation of a shooting star. Guess they didn't get it.
Tomorrow is the 7th week to Christmas post and today is your last chance to get this weeks tutorial.
Thanks,