Thanks,




 This is so adorable, it fits in the palm of your hand. There is just something so fun about mini mini albums.
 The tiny suitcase opens up to reveal a tiny mini. I also love mini albums that are relatively quick to make.
 Inside there are pages with pockets and simple yet fun embellishments. You can see the video for this project below.
 Sew Cute...exactly what this mini album is. With a sewing theme throughout and wonderful color scheme, this is an adorable mini that will fits comfortably in the palm of your hand. Lots of embellishment, jounral spots and places for photos. This class will be held in my scraproom in late March. See my store site for more details if interested.

 I am finally getting around to having a class. This is a repeat class. My daughter created this project several years ago and the tutorial has been very popular. I recently created a custom die for this as it takes a very long time to hand cut all the pieces for one set, let alone for a whole class.

 I used the peekaboo frames to create embellishments for the pages and adhered them so that they also act as pockets to be able to tuck photos in behind.
 I used flowers fro Prima and I Am Roses to embellish as well. The ribbons are from Stampin Up.
 Here is the class version of the long policy envelope mini. This class will be held in September.
 The layout is almost exactly the same as the previous mini, but I used Stampin Up's Paisley Petals Designer paper.
 I love this paper, bright, bold designs in Paisley prints.
 This is one of my favorite pages. Hope to see you in class in the fall!
 Hi Ladies,
 This is the first page. I adhered all the matt die cuts so a tag can be inserted behind each to add a jounal spot.
 I love her paper choice. It is called Cottage Wall. It is no longer available, but I think I still have a couple of packs that I stocked up on of this paper.


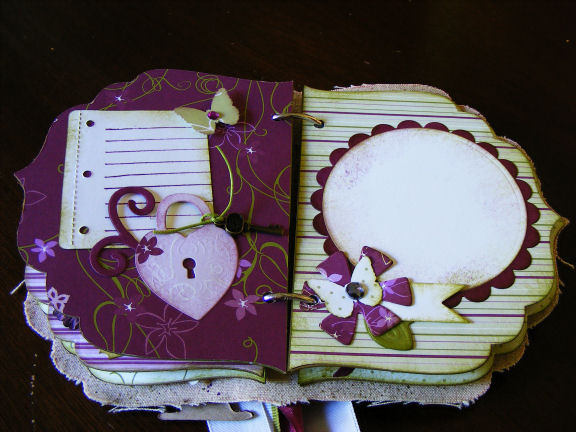
 The last double page layout. I love the small banner she has used in the mini. I thought it was a nestie, but after searching, I am not so sure. I will have to ask her.
 and the last page. I love the mini birdcage and bird accent. I have this die but have not used it yet.
 This mini is designed to look like a grad hat. The center of the cover has a tassel as it very simple and only embellishment.
 Here is one of the pages inside the book, here there is a circle photo/journal spot that is removable. It simply tucks in behind the pocket, which contains a mini file folder more more photo/journal opportunities.
 This page has some flowers and gem flourishes to accent a photo matt.
 This page uses the TopNote shape for a photo matt and has a punched accent and stamping to embellish the page.
 This mini has a different binding, you will need to see it in person to fully appreciate it as I was unable to get a good photo of it. There are more pages which you will get tos ee when I get around to doing a video for this mini.
 This adorable mini milk carrier was a free class I offered to the Sister at my church. You can put little treats inside the boxes, and they open just like a milk carton. My friend, discovered that if you can get three of these die cut shapes from one piece of cardstock if you cut it just right. Cut one 4 1/4" piece on the the 8 1/2" side, then cut the remaining piece in two at the 4 1/4" mark. This makes the bottom flaps shorter, but they will still close and completely cover the bottom opening. If these instructions aren't clear enough let me know. Thanks Irene for figuring that out!
 The milk cartons are made using die cuts from a Sizzix die available from SU. The carrier I created myself based on the size of the milk carton.
  I trimmed the carrier with the bird and branch punch pieces, also available from SU. I know dies are great but I love my punches too. This punch is so easy to use and it is sooo adorable. Love It!
