Showing posts with label cards. Show all posts

Wednesday, September 14, 2016

CASE of the Birthday Note Card


 My hubby asked me to make his mother a birthday card, so I went to Pinterest and said pick something out that looks like a card you would give her. He picked one similar to this. Of course I couldn't make it exactly, 1. I wouldn't have same supplies and 2. that would be unfair to make exactly to the original artist. I love his choice as it is a style I enjoy.


The sentiment is stamped in permanent Black ink. and then several hearts are added on pop ups to add dimension to it.


The tag is attached to the twine wrapped around the note page. A sentiment is also stamped in black permanent ink and another heart added to tie it all together.


I added sponged vintage photo ink around the edges of the elements except the hearts (oops).

Thanks for checking in,
T

Monday, February 8, 2016

Visiting Teaching Handout for February 2016

Our sister's in our church monthly visits our sisters and present a spiritual message and check on their personal welfare. This month's is on Marriage is ordained of God. 
After reading  the message this is a handout idea that came to mind.
As a couple works individually towards the Lord, they also get closer to each other. This handout is interactive and shows how they achieve this. You can use this idea for your visiting teaching if you wish.
First I cut a piece of blue card stock in half longwise.
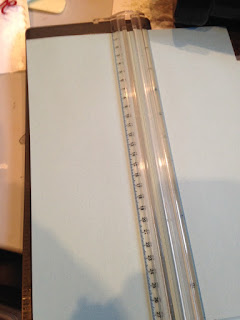
 Then I die cut a heart out where I wanted the fold line to be. I did not want to cut through the whole way so I positioned my cut plate only over the part I wanted to cut.
 I then folded at the bottom of the cut out.
 This left a space at the bottom back that was longer than the front, this is because the people attatched later kind of hang down past the edge.
 I then used a die to cut out figures representing a man and a woman.
 I copied the part of the message that went with his handout and pasted to the inside of the card
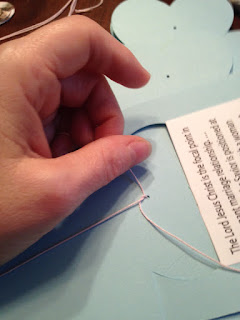
 On the cover of the card I punch 3 holes using a 1/16th inch hole punch as shown in image.
 I then punched two holes in each figure as shown. They are slightly angled on purpose as they will be sliding up the string on an angle.
 I then cut string about 18 inches long and threaded through the top holes in a figure
 try to center mid way on string
 then thread top piece through hole on top of card
 and the lower piece through the bottom side hole on card
 turn card over and pull string end towards top of card trying to keep them even
 tie in a knot at the top hole as shown
 then pull leftover string towards bottom of card and knot off two pieces together
 this will be your pull cord to lift figure closer to the lord.
 I then made a small tab to put over to keep it on the side of each person so the strings didn't get tangled.

 Thread other figure onto card as done for first figure but on the other side of card, going through the same top hole.
 Finish off the same as for first string
 Turn card over and gently pull figures to the bottom of the card
 I then used a small piece of pop up adhesive to attach a heart to each figure, being careful to NOT cover the string

 Then I printed a small image of the Savior , die cut it out with a circle punch and attached it to the front of a larger heart
 On the back of this heart I added several pop ups and then adhered to top of card, centering inside the die cut card base heart and being careful, again, not to stick to the strings.

 You can now pull on the strings and see the figures move towards the Savior and also get closer to each other.
 This is them both at the top
 To pull them back down turn card face over and slide knot back to the top.

 I hope you enjoyed this tutorial.
It has been a while since I posted,
Thanks,
Tammy

Wednesday, May 14, 2014

Father's Day Class Cards

I always enjoy creating when I get to use my style in the project and Father's Day works great for it.
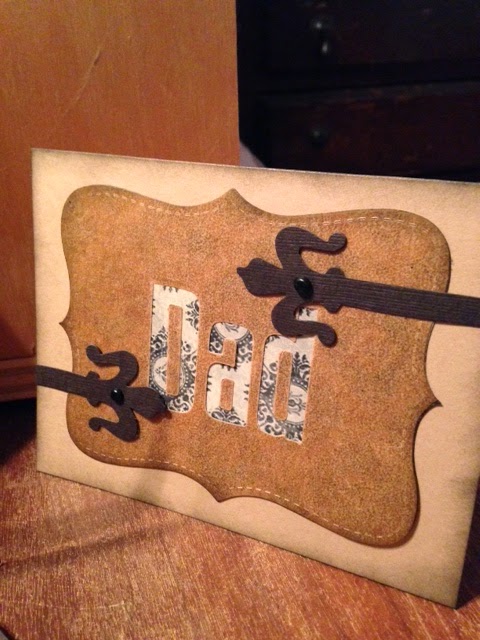
I created these three cards for a class.

I used a peek a boo technique for each card.


This card used Stampin Up's ever popular Top Note die for the card mat. I used a Tim Holtz Mover & Shapers circle to cut out the hole.
Behind the hole I added several gears, also Tim Holtz, to create a peek into effect. I created the pocket watch using another Tim's die and a circle punch and then a stamped clock face punched out with another circle punch slightly smaller then the one for the mat.
I added a fishtail sentiment and for a final touch adhered a metal gear to the top.


I like to call this one the leather card, because the glassine paper used gives the look of leather. Again cut the mat from Stampin Up's top note die. Then used Two different My Favorite Things alphabet set dies to create the Dad cutout. I adhered a second layer of the Top note die cut behind the first. The added some vintage finding die cuts as final touches with brads added to the holes.


The last card was a center fold out card.
I used a Baroque die from Tim Holtz for the front mat and for the inside sentiment mat as well.
I adhered the front mat to the left side of the front opening. I then cut a MY Favorite Things Viewmaster wheel and cut 6 of the matching pieces to cover the openings. I stamped them with a small font to spell out THANKS and then adhered to the back of the wheel. I finished the wheel with a game spinner and brad in the center. I then adhered to the top and slightly to the right on the mat.
I added a die cut alarm clock by Tim Holtz. This card was not keen on staying closed so as it's final touch I added the photo turn closure in the lower right corner.

Thanks,


Monday, September 2, 2013

Custom Baby Invite

I made these cute invites today to show off two new dies. Diaper and diaper mat.
These went together so quick and look so adorable.


Hope you enjoyed seeing this and looking forward to posting more inspiration for you.

Thanks,

Thursday, August 8, 2013

A Birthday Card


A card I made for my nephews birthday,he is now a teenager.

Thanks,

Thursday, April 19, 2012

Club Cards

Here are the cards we made in March Club. The first uses Stampin Up Apothecary set from the mini. I love this set and the co-ordinating framlet dies.


This secornd card uses the new border edge die, and embossing folder and fun stamp set from Sal-a-bration.

These were fun to make and I really love the first one.

The only thing I found tricky was the edge die, it wanted to move just as it went through the Big Shot. Perhaps a wee bit of tape would help it stay put!

Thanks Irene.

Hope you enjoyed seeing these cards.


Thanks,