Wednesday, December 24, 2008

Merry Christmas and Happy New Year Everyone!

Just want to wish everyone a Very Merry Christmas and A Happy New Year. Thank you all so much for making my Blog a success. Looking forward to a great new year with lots of new and creative ideas and fun classes.
Hope you all are able to enjoy time with family and friends and may all your bestest wishes come true!

Thanks,

Friday, December 19, 2008

Mini Gift Box Tutorial

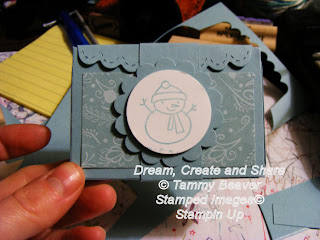
Okay, I have been playing around with my dies and this is something I came up with using the Scallop Envelope Bigz Die. Isn't it adorable! It is a mini gift box. Not sure what it might hold...but it is so cute. So, here is a Christmas present to you all... a tutorial on how to make this box. So here goes...
Step 1: Cut out two of the scallop envelopes.( this one has extra score lines on it, because I decided to do a tutorial after I did the next step)

Step 2: On the top and bottom flaps, score an additional line one half inch away from the box edge on each envelope.


Step 3: Then cut the extra piece off of the larger flap.


this will leave you with two pieces that look like this..(see below)


Step 4: Add adhesive of your choice to the three flaps on one envelope that are not scalloped.


Step 6: Adhere to bottom flaps of both envelopes together..


Step 7: Then adhere the sides of the two envelopes together. Press gently on the inside of the box to secure adhesive. Be careful not to distort the box during this step.

Step 8: Then fold one of the top flap to the inside of the box.

Step 9: The fold other top flap down over front of box.


Step 10: Cut a piece of Designer Series paper for the front of your box. Cut this slightly smaller than box front size so it is matted.


Step 11: Cut a one inch by seven inch strip of matching card stock and gently wrap around box, lightly pressing on creases to get fold lines.


Step 12: Press crease lines with a bone folder and then wrap around the box.


Step 13: Apply adhesive to belly band where it overlaps and secure.


Step 14: Cut out a scallop circle out of matching card stock and a one and three eighths circle out of whisper white with your choice of stamped image on it.


Step 14: Add a dimensional to the back of your stamped image and adhere to the scallop circle.


Step 15: Apply adhesive to belly band where scallop circle will be attached.


Step 16: adhere scallop circle to adhesive and secure.

and Voila! you have made your cute little box. Hope you enjoyed this tutorial and hope it was clear enough. Please note that this box is just a tad bit too small to hold a gift card!

Merry Christmas everyone,

Thanks,


Monday, December 15, 2008

A Postcard for a Friend

A friend of mine moved away and another friend is making a special book for her, and asked me to make a card from me to her for in the book, and this is what I came up with. It is a postcard of sorts. Here is the front. The back has a personal message to her, so I did not show that.
Here is what the pocket inserts says. I used various friendship stamps for this projects and a chipboard letter and a Prima flower with a gem brad. It was very fun to make.

Thanks,


Thursday, December 11, 2008

Milk Crate Fun!

This fun project was created using Becky's template she has for sale on her Blog Inking Idaho. This is such a fun project. I have done mine up in a Valentine's theme. I know, I know....it is not Valentine's but too bad...this is what I did with mine.


Thanks,


First Class for the New Year...

Okay, I know I said I would not be posting anymore until after Christmas, but I wanted to share this. It is going to be my first class in the New Year. It is a Gratitude Journal and a page marker. It has a vintage feel right down to the imitation wrought iron hinges.
Here is a close up of some details.

There is a pocket on the inside for your page marker or a note if giving as a gift.


There are several sections, so you can categorize what you are grateful for.

My goal for the new year is to see how selling my kits and finished projects goes online. So in the New Year you will be able to get this project one of four ways.
1. Take my Class - January 8th 6:30 - 9:30 pm (if you are in my local area) fee $18.00 and everything is included. As always you only need to show up and you always go home with a completed project.
2. Buy Instructional kit only - this will be a PDF file tutorial that will be e-mailed directly to you upon receipt of payment. Fee $12.00
3. Buy a materials kit - you will receive a kit that is stamped and ready for you to assemble. I will ship anywhere in Canada and the US. The Kit fee will be the same as the class fee as I will be doing extra preparations that you would normally do yourself in class. Kit Cost $18.00 + shipping and handling fees.
You can pre-order this item..but they will not be shipped until after the class has run.
or
4. Fully Completed - You can request for me to fully create this project for you and then I will ship it to you. This will cost extra as I will be doing all the work. Completed Journal fee $24.00 plus shipping and handling. Again, you may pre-order this item but this will only ship after class has run.
For those purchasing kits or completed journals I will be using PayPal. Please note prices are in Canadian dollars.
I look forward to the New Year and this new way of making my projects available to you.
Thanks so much,


Wednesday, December 10, 2008

Part 2 - the Pizza Box Tutorial

Okay...here is the last part of the tutorial. I was unable to do it all as one video since You Tube doesn't allow videos longer than 10 minutes.


This box is great just as a gift box as well. One of the ladies in my class said it would be great for a large homemade cookie.So don't feel limited in the possibilities and Merry Christmas everyone. I may not get any more posts before the new year since I haven't started my Christmas gifts as yet. I still have three orders to complete and then I get to do what I need to do. I do, however, have my decorations up - including my Tree!

Thanks,

Tuesday, December 9, 2008

Countdown Calendar Tutorial

I am so excited. I have finally created a tutorial after trying so many times. This is part one. There will be another for the box that this project goes in. I have to apologize because the phone rang right at the beginning and I did not restart, and later on the baby is crying waking up from his nap, and I did not go get him until the video was done.


This is for people who took the Christmas Countdown Calendar class and took kits home to do later. I have not included all the measurements, but the chipboard is 4" x 4". so perhaps you can figure all the rest out from that.
I would appreciate any comment on this video...since it is my first.

Thanks,

Friday, December 5, 2008

I've Been Chosen to....

Receive this award...the Keative Blogger award. Joani over at Cards made by Hand has nominated me. Joani thanks so much for thinking I deserve such an award. I have always loved being creative.

Here are the rules: The winner may put the logo on their blog; put a link back to the person that sent you the award; nominate 5 blogs; put links to their blogs; leave a message for your nominees.

So here are my nominees....dum, dum de dum.......(that was supposed to be a drum roll)...

I have to say it is a challenge to only pic 5 but here goes.

I chose Arin at Arin Stamps , her Blog is very very new, but from what I see so far , it is gonna be one to keep an eye on,
Wendybell at Wickedly Wonderful Creations. Absolutely beautiful creations.
SparkleGirl at her Blog, love the simplicity yet detailed work in her cards,
Jackie at Kreate with Me 2 , another newbie, but by the looks of what she has created so far another one worth watching,
and...
Tracy over at Who Is Tracy, Tracy has many areas of creativity...from what I can see....kind of like me.
I hope I did everything right for this....and thanks you everyone for sharing in the joy and fun of creativity.

Thanks,


Tuesday, November 25, 2008

Special Orders!

At the craft show I was in this past weekend, I was asked to make a couple personalized journals. One was to be mostly blues with a hint of red and the other pinks and purples. They are for two small children.

Elastic silver cording is wound around each of the beginnings letters for their names. A gem is glued to the top of each letter "i" and a gem brad at the end of each name for decorative accents. All of which is on dimensionals.
The letters are covered with card stock, versa mark, heat and stick and then finally dazzling Diamonds.

I used Prima flowers and tiny beads for the flower border on each book cover. Assorted fibers were used to trim the binding which was done using my Bind It All. I am so glad I have this tool. It makes projects have such a nice finished look.

The inside is divided into four sections each. The section dividers are card stock and the pages are basic lined paper.

On each divider there is also a place to write some special notes or whatever.


Do you think they will love them? I hope so, I know I had fun making them.

Thanks for looking and have a great day!


We Have A Winner!

Good morning!

I have taken my winner from www.random.org number generator and the lucky winner is ...

Here are your random numbers:4

That means our winner is...

Carley said...
Hi Tammy, just wanted to say thanks for all the crafty inspiration, I'm loving all of it!!!1. Your first post was the "Dad" Book on May 30, 08.2. You'd posted 47 times at the point of that post.3. Your favorite crafting items would be Books and Cards.Thanks again for a chance to win and for the great ideas!Carley

Carly,
Thanks for playing and I will get in touch with you regarding your address so I can mail you out your stamp set.

Thanks so much to everyone who helped me reach this first milestone, I am looking forward to the next and will plan an even better Blog Candy for that one.

Thanks,

Saturday, November 22, 2008

More Craft Show Stuff!

I had a few of these DVD tins left from last year and thought I would do up a couple of them for the craft show...so here is how they turned out.

I embossed swirls in silver on each tin.


Here is the inside of each tin. Each has a note pad, that I had to trim slightly on the bottom edge to get to fit in the tins. Each has a RSVP pen with matching DS paper inside.


Here is another angle for the cover...


and here are close ups of each of the flowers, the red one has stickles to add some glitter, and the blue one has some silver glitter.


Here is a close up of the loop holder for the RSVP pen. I used elastic cord laced through two eyelets and knotted in the back.


and here is a picture of the card insert for the envelope. If giving as a gift you could write a personal note here.


Don't forget to that there is Blog Candy here! Giving away a free stamp set to a lucky person on Monday!

Thanks for looking,