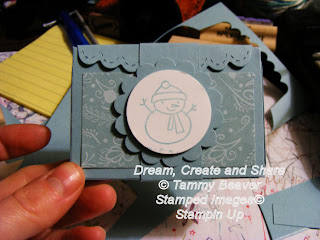
 Okay, I have been playing around with my dies and this is something I came up with using the Scallop Envelope Bigz Die. Isn't it adorable! It is a mini gift box. Not sure what it might hold...but it is so cute. So, here is a Christmas present to you all... a tutorial on how to make this box. So here goes...
Step 1: Cut out two of the scallop envelopes.( this one has extra score lines on it, because I decided to do a tutorial after I did the next step)
 Step 2: On the top and bottom flaps, score an additional line one half inch away from the box edge on each envelope.
Step 3: Then cut the extra piece off of the larger flap.

this will leave you with two pieces that look like this..(see below)

Step 4: Add adhesive of your choice to the three flaps on one envelope that are not scalloped.

Step 6: Adhere to bottom flaps of both envelopes together..

Step 7: Then adhere the sides of the two envelopes together. Press gently on the inside of the box to secure adhesive. Be careful not to distort the box during this step.
 Step 8: Then fold one of the top flap to the inside of the box.
 Step 9: The fold other top flap down over front of box.
Step 10: Cut a piece of Designer Series paper for the front of your box. Cut this slightly smaller than box front size so it is matted.

Step 11: Cut a one inch by seven inch strip of matching card stock and gently wrap around box, lightly pressing on creases to get fold lines.

Step 12: Press crease lines with a bone folder and then wrap around the box.

Step 13: Apply adhesive to belly band where it overlaps and secure.


4 comments:
This would be perfect for gift cards!
Oh Tammy, I've got to do this!
It's adorable! TFS all your wonderful creations!
Hugs,
Joani
This is very cute, thanks for the tutorial
I love your blog, the name tells it all. I dream you create and I am so happy you share! I can only dream of making the wonderful creations you share. Thanks so much, you are Amazing!
Post a Comment